
|
Best Games - Populous
Populous is a game where your primary method of interaction is to raise and lower the level of the ground one small patch at a time. Understandably, that might not sound very compelling, but when you play Populous hours disappear in a snap. While there might be an argument to be made that there are a couple of simulations that might count as the first ‘God Game’, I don’t know if there are any contenders for the first truly enjoyable ‘God Game”. Populous is it. Before Populous there was no ‘God Game’ genre. A game where you don’t directly control the tiny characters running around on screen, but instead, you control the world they inhabit. Changing the land to direct outcomes. Using natural disasters as weapons. Reinforcing your followers' zealotry, making them more formidable and destructive when they tangle with an opposing god's followers. And that’s the magic of Populous. While you are consistently told that your followers are good and the opposing followers are evil, when you survey the world this other god’s followers largely resemble your own. They build the same homes and structures. They operate by the same rules. They are a palette swapped version of your own people. So that means you must destroy them. You probably won’t be more than a few levels into Populous when it occurs to you. Am I the baddie? Is there anything that truly makes my people different from the ‘Evil’ populous. Did they do something to deserve the volcanoes, earthquakes, and floods you send their way? Of course, that’s a question the game will never answer. If they are left uncontested, the other god’s people will surely eradicate your own. So there is no sense equivocating. An uncaring world has set you in opposition, so you must fight. Or tip the balance in favour of your own people so that they can fight. Certainly, the structure of how the game is played, with very clear and simple icons as an interface, might make it compelling. Especially for people in 1989, accustomed to much more arcane and impenetrable game interfaces. But I think it’s simpler than that. Populous, like a lot of other Bullfrog and Peter Molyneux designed games, the morality of Populous is grey at best. There is something inherently exciting about being a tiny bit evil. Synthetically dark hearted. Populous is a game that understand that the very notion of an all powerful god that favors one people over another comes from a very bad place in human nature, and then makes light of it. After all, these are just a bunch of goofy little pixel people, right? When you destroyed a thriving village with an earthquake just so it would be easier for your devoted knights could more easily walk in and slaughter the survivors, that was all in the name of good, right? It’s just a bit of digital fun. If you can play all 500 levels of Populous and come away with a positive outlook on the way people have conducted themselves religiously over the past several thousand years, I would be very surprised. On the upside, you would probably have had a lot of fun. Populous is, absolutely, one of the Best Games.
0 Comments
Writing recently has been … slow.
I think doing the ‘write a story every week for six weeks’ thing is great for getting a bunch of practice coming up with concepts. It’s even great for completing projects, since you pretty much have to complete them to submit them. It does burn you out on writing for a bit though. I got back rejections for the last of the stories I had out, so for the first time in a while, I don’t have anything in a queue at a magazine. I will send them back out, well at least one of them will be going back out, but still, it’s a bit of a bummer to not have any out right now. I know that at least one of my six week stories can probably sell, but I also didn’t want to turn around and send any out before I had a chance to really punch them up. I think I have forgotten them enough at this point to be able to edit and revise with a clear head. And then I have my two - no - three almost finished stories that I need to wrap up and send out. Along with all the flash stories I wrote last year. So there is no shortage of things to write or submit. I guess it’s time to go peruse the markets again. If you have read many of these posts, you know that this place has always been about video game ephemera, from actual development talk to musings on old titles. More recently these posts have also been about fiction writing and everything that goes along with it.
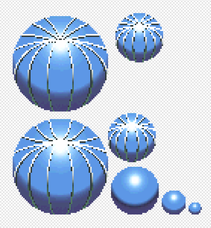
Well that ends today. Unbeknownst to you, and even me, I have spent the last decade writing a collection of the filthiest limericks ever conceived. Each one more grotesquely bawdy than the last. All of this work was conducted while in a deep, near comatose, sleep, and hidden below the foundation of my home. I believe that, in some self preserving subconscious place, I knew that these verses were not meant for waking eyes. But I have unearthed them, and I have read them, and I must unburden myself of them. Every week from here on out, I will release a single line from one of these foul poems. The first line of the first limerick is at the bottom of this page. With that, this place will forever become a marathon of horror, and for that I am sorry. There once was a man from Regina - The 90’s era arcade game that I have been working on for some time is finally starting to gel. The shaders that were very difficult to get right are nearly perfect. The pixel alignment script that took a while is now rock solid. The scale and angle of objects that didn’t want to comfortably fit under an orthographic camera now seem to work properly. One of the last things I needed to nail down was how to consistently create textures that look and feel like sprite and tile pixel art. In common fashion, I’m not creating them in the traditional way. People have been creating pixel art since the late 70s. Images that can be moved around a screen on discrete pixel unit at a time. That usually meant that they would draw the image out on graph paper, highlight specific colors if that was a capability of the hardware they were using, and then enter that ‘map’ into their game as code. Or, if they were an artist and not a programmer, they would hand that sheet over to someone else to punch into the computer. That went on for quite a long time, well into the late 80’s. Eventually computer aided art tools were developed that allowed artists to handle the art side independently. They would create the graphics and hand the finished file over to whoever was tasked with squeezing it into the game. A much cleaner workflow, but creating pixel art typically meant creating art a pixel at a time. Like a slightly less cumbersome light-bright. Gradually we got to the point where pressure sensitive tablets and screens using extremely sensitive electronic pens can pair with ridiculously sophisticated art software allow an artist to draw and paint as though they were using traditional media. It’s actually sort of amazing. I’m mostly using vector tools. Vectors drawing is like using mathematically defined shapes and regions to create art as opposed to scratching a mark onto a surface. The mark is easy to make, but it’s mostly static. It stays how and where you put it. That can be very useful. Sometimes you just want to make a mark in a specific place in a specific color. But sometimes, you want to make a box, and then have that box remain scalable, rotateable, and variable forever. When I create using vector tools, I am defining the parameters of the image, parameters that I can change at almost any time. Creating pixel art with vectors lets you get away with a lot of strange things. Tiling and palette swaps are trivial. Creating variations on a single tile is not only easy, but kind of leans into how these vector packages work. It’s playing to their strengths. I’m sure that I’m not the first person to do this. There are probably countless artists currently using this workflow for pixel art, but I haven’t really seen it out there in the wild. Anyway, here, enjoy some parametrically created pixel art.
Best Games - PaRappa the Rapper
Hit buttons in time with the music. That’s the pitch. That’s PaRappa. It shouldn’t work. It shouldn’t be fun. For a time, rhythm games were the biggest thing in the world. Dance Dance Revolution, Beatmania, Guitar Hero, Rock Band, and on and on. They still exist, of course. No real arcade would be complete without some sort of dance based rhythm game at this point. They aren’t as prominent as they once were, but it’s almost difficult to imagine the world before rhythm games. Back when the most rhythm adjacent game you could find was Simon. I’m not sure if the core gameplay of PaRappa the Rapper would have worked if it had been as lean as many DDR games. Had the presentation of the game been as spare. At its core, Parappa is a timeline with timing marks on it. An icon travels along the timeline and when it is over certain segments, it prompts you to press a button. That’s it. That’s the game. When the icon reaches a certain point on the timeline, a timeline that corresponds with the beat of the music, you press a preselected button. You can play around with other buttons at different points on the timeline, but the game really only requires you to press a button at that one particular moment. All of the things that videogames are known for, freedom of movement, improvisation, variable interactivity, those aren’t required in PaRappa. Just press the button when you are asked to and the game will be satisfied. Now, you can improvise, and you can play with the beat outside of the required hits, and the game will reward you for that, but you don’t need to. You can just hit the beats, and you will progress. If you aren’t familiar with rhythm games, I can imagine that this description doesn’t sound very fun. You’re right. It shouldn’t be. But it is. Maybe that shouldn’t be surprising. After all, playing music is fun. In some ways, a game like PaRappa turns the PlayStation controller into a musical instrument. When you hit a button the game will make a corresponding sound and it is up to you then to make those sounds rhythmic. The game is asking you to do the fun part. There is another aspect of PaRappa the Rapper that I should probably touch on. It’s the part that most commentary on the game would probably get to first. PaRappa is completely unhinged. The game plays out in a series of animated skits populated by a cast of paper thin characters. Each skit concluding with a song for you to play along with. The skits typically involve the title character, PaRappa the Rapper, rapping along to some sort of skill building life event. Learning Karate, taking a driving test, learning to bake. It’s all very simple and silly, but every aspect of the game is painted with levels of bizarre and surreal. Character dialog is often nonsensical. Line deliveries are spectacularly odd. Considered motivations are usually nonexistent. In PaRappa’s world things happen simply because things happen. You just have to go with the flow, and, as you are constantly reminded, you ‘gotta believe’. The packaging of this very simple gameplay loop is lively and odd and perfectly charming. If rhythm games needed a kickstart, PaRappa was designed to deliver. Now, decades later, PaRappa doesn’t really compete with the Rock Bands and Guitar Heros of the world, but it is still a very special game. As goofy as it is challenging and without a doubt, one of the best games. Work continues slowly, but slowly, on my 2D pixel art game that is neither 2D nor pixel art.
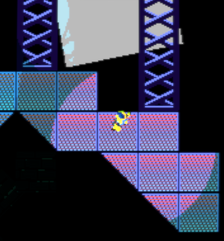
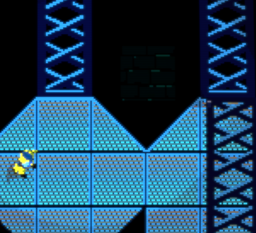
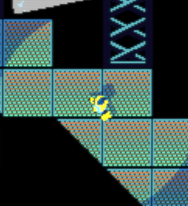
I redesigned and rebuilt the player character model and started the process of rigging it for animation. This game is going to be a strange looking thing. Like an alternate history version of a Capcom CP System game where they put in support for colored lighting, shadow casting, and 16x9 displays. A real chimera of the old and the new. I also started on (restarted really) level and environment design. A lot of the things I didn’t think I would be able to get away with, It turns out I can, as long as I manage any moving objects with a little piece of code I wrote that keeps everything snapped to perfect screen pixels. There are a lot of pixelation shaders out there that crunch polygons and textures down to strictly paletted pixels but there is no fooling anyone if the models still move like they are 3D objects. Spinning, moving too smoothly, antialiasing in sub pixels, or picking up specific specular highlights. They can be 3D objects, but they have to move like they have the limitations of sprites. When I first tested the animation, I found that making some very crisp, pose to pose, animations without a lot of in-betweening looked pretty good, but it was missing something. When I finally figured out what the problem was it seemed pretty obvious. What I needed to do was to make a set of very fixed poses and then do a small handful of tweens, but with no real timing between them. So no held frames would be baked into the animation. Instead, I used the game engine to pull the frames one at a time when they were called for the specific animation. Running for instance might be 6 or 7 frames. But rather than just play “run” as a complete animation, I found that I would call each frame based on the speed or direction of player input. Speeding up or slowing down the animation the way you normally would added some extra smoothing and mush that looked every inch a 3D model pretending to be a 2D sprite. Calling on each frame in the sequence as needed, looked very different. It looks more like 2D animation. It shouldn’t be shocking at all, since that’s more or less the procedure you would use to animate a game character circa 1990. Sometimes the old tricks can be the new tricks, only with colored lighting, collision physics, and shadow casters. I know it’s a cliche line to say that there is always more than one way to accomplish anything. I think that might be especially true for computer graphics. Of course, there are as many paths and processes to creating something like a painting as there are people who paint them, but you would think that with a system as rigid and, literally binary, as a computer, that there would be some processes that can only be done in one way.
I have a recent example. I am trying to achieve an effect, something sort of like feathers or the little strips of paper dangling in layers from a pinata. Over the course of a few hours I discovered about a dozen ways to do that. Some of them are existing, even old by computer graphics standards, techniques. Some of them are combinations of strategies. A couple I came up with and for all I know they are completely novel. Some of them are purely geometry based. Just manipulation of triangles. Some of them are combinations of geometry and shader programs written to run extremely quickly on a computer’s GPU. A couple are purely image based, using layers of textures. The best ones for my purposes are probably combinations of all of these. Not one of them is the wrong or right choice. They all have their tradeoffs. I have thought many times over the years of getting a job teaching 3D modelling or animation. I have even applied a few times. I was once offered a job almost on the spot to teach a 3D course, but I turned it down. I didn’t think the school’s curriculum really aligned with the way I think digital art should be taught. There is not just one way to create anything, and there is not just one way to teach it. I think that might be my problem. I have been doing computer graphics a long time, and I can see so many potential paths. Trying to tell someone new to it that there is a right way to do anything, or that they should try to do things the way that I do them just seems so wrong. Wrong and possibly harmful. People should work the way that works for them. But that also means that you need to try a bit of everything, be a generalist, before you know what does and doesn’t work for you. Should a person new to, say, 3D modelling start by sculpting, hard low polygon modelling one vertex at a time, work orthographic or in perspective? I don’t know. I have a lot of tools in my arsenal at this point, but mostly, I know that I don’t know everything. I don’t have that self assured bravado that someone might need to walk into a classroom and declare that they know the path to getting you from zero to 3D artist in a few months. I know too much to think that I know that much. Best Games - The Irritating Maze
The Irritating Maze is not a complex game. It is not a game that defines or extends a genre. You will not find a compelling narrative or ingenious mechanics here. The Irritating Maze is simple. But it’s the right kind of simple. The Irritating maze is the most pure sort of game there is. A test of skill. When you start you get to choose from a wide selection of playable characters. Either Man or Lady. It doesn’t really matter, though, because the game plays identically no matter who you choose. After that, you guide the tip of a metal rod through an electrified maze filled with hazards. That’s it. That’s the game. Guide what amounts to a round cursor through a maze. Don’t touch the walls. Then do it again. Then again. Win. But you probably won’t win. The Irritating Maze might be simple in concept and design, but it is ridiculously hard to play. There are only three levels, but just making it halfway through the second one is an accomplishment. Some of the hazards are truly devious. Parts of the maze move, there are rapidly moving wheels, and at one point the game traps you in a small box, and then moves the box around. Sinister. Released to arcades by SNK in 1997 without much fanfare and based on a mid 90s Japanese variety show segment that very few people in North America and Europe would have been familiar with, it’s no wonder that The Irritating Maze is not a very well known game. Maybe you will just have to trust me then, that this game is so perfectly executed that it’s amazing it didn’t spawn a wave of copycats and sequels. The Irritating Maze is one of the few Neo Geo arcade games of the time to be built into a special cabinet. It used a trackball controller and sported an air cannon that would blast air in the players face when they collided with one of the walls. I suppose that incorporating a metal trackball that would actually shock the player would have been a lawyer's nightmare, so they went with the air cannon. Probably a safer choice. Still, the game starts with a warning that any person who is pregnant or has a heart condition should not play The Irritating Maze. Maybe they should have put that on the cabinet in bright glowing letters. We would probably be playing The Irritating Maze 15 today if they had. There is a place in this world for wild dynamic systems based games and vast arrays of player verbs, but sometimes, sometimes, you just want to move carefully through a maze. That makes The Irritating Maze one of the Best Games. |
Archives
February 2024
Categories |
 RSS Feed
Owen McManus